
I have managed to pull out my Christmas snowmen and put them out and my outside lights are up, although my hubby informed me last night (the first night my lights were up) that only half the strand I put up on my banister is lighting. Upon inspection today I realized that someone has broken one of the bulbs after I put them up.
While putting up my snowmen I noticed that the part of my wall that is immediately visible when entering my front door was bare. Oh no!!! Then I remembered a project I had seen in one of my many craft books. (Don't ask which one because now that I am looking for it, it has mysteriously disappeared!) They had taken an ordinary furnace filter and painted a pumpkin on it and painted the cardboard border. Well, I got to thinking that this would transfer to Christmas well. Keep in mind I am NOT a painter by any means. I can paint in the lines but that is about it so this is a VERY easy project. Thought I would share it with you today.
Also, sorry the pics are sideways but I didn't realize that I couldn't rotate them, or at least that I (read I am not very knowledgeable about blogging or how to make these things work the way I want them to) am not able to rotate them.
Christmas Funace

You will need:
acrylic paints (below is what I used but only because it is what I had on hand, feel free to use whatever colors you want!)
FolkArt parchment #450
Apple Barrel Colors Maroon
Apple Barrel Colors Territorial Beige
Outdoor/Indoor Gloss Real Green #20421
FolkArt enamels Coffee Bean #4013
1 furnace fil ter that is white (the old fashion kind that you can see through) any size
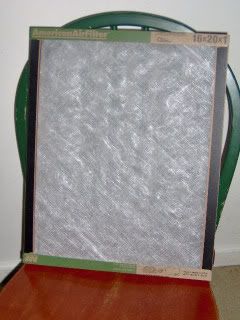 ter that is white (the old fashion kind that you can see through) any size
paper towels
raffia (I used maroon and green)
old toothbrush
hot glue guna trash bag (optional)
Directions:
I begin by painting the cardboard border first. Mix equal amounts of parchment and territorial beige. Use this to paint the carboard portion of the filter. You don't have to paint the back, but definately paint the front and sides. This took 2-3 coats for me. Be sure to let it completely dry between coats or it ends up getting soggy and bends/warps out of shape...trust me!
Once the base coats are dry, you are going to "speckle" the borders. Pour some paint onto a plate and dip your toothbrush into it. Now, use your thumb to splatter the paint from the toothbrush onto the border. I suggest you try this a few time on a practice paper first as it takes some getting used to. Repeat until the border is speckled all over with green. Rinse the brush and repeat this with the maroon. Allow to dry completely.
Now the fun part. If you have not already done so, cover your work surface with the trash bag as this step uses LOTS of paint! Put a large amount of green paint onto a paper plate. You will be using pieces of paper towel as your "paintbrush".

Dip your papertowel into the paint and then dab onto the filter. You can put a big blob of paint in one spot, dampen your papertowel and use it to blend the paint out into the desired shape. Or you can just use straight paint and dab. Don't try to get straight, solid lines as it won't work!
If you mess up, I say this because I did...ummm...several times, you can fix it as long as your paint has not dried.

Simply take your work of art to your kitchen sink. Make sure that the faucet is NOT over the work of art (not shown in the picture but TRUST me on this one) and use your sprayer to spray out the paint from the area you want to redo. Allow this to dry completely before painting again or else the gloss paint starts to look pale and bubbly.
Once you have painted the tree with the green, use the same technique to add a trunk and allow this to totally dry. Then, take some maroon raffia and tie it into a bow. Hot glue this to the top of the tree. (Don't apply the glue to the filter, rather apply it to the raffia and then place on the filter. Otherwise, you will melt the filter. Again TRUST me on this!)

Using maroon and green raffia, create a braid about 18 inches to 24 inches long. Poke two holes into the top of your filter. Take an extra piece of raffia and make a loop. From the back push this loop up the hole you have created in the top. Put one end of the braid into the loop and pull the loop back through the hole. Knot the braided raffia, apply a dab of hot glue to the knot and then pull the braid from the top to secure the knot on the underside. Repeat for the other hole to create a hanger for your work of art. Taa Daa! Your own quick, cheap, easy work of art to decorate your house with. Be sure to sign it on the back and enjoy!

Christmas Furnace by Ginny Blankenship is licensed under a Creative Commons Attribution-Share Alike 3.0 United States License.