I am currently working on a few pattern designs, Princess A was sick last week, Little Man J was sick over the weekend which meant that Momma Sunflower was sick yesterday. How is it that my little sunflowers don't want to share doing dishes, doing laundry, vacuuming, yard work etc but they are SO willing to share illness?! Just doesn't seem fair!
Anyway, today all felt better so I got to make these little goodies:
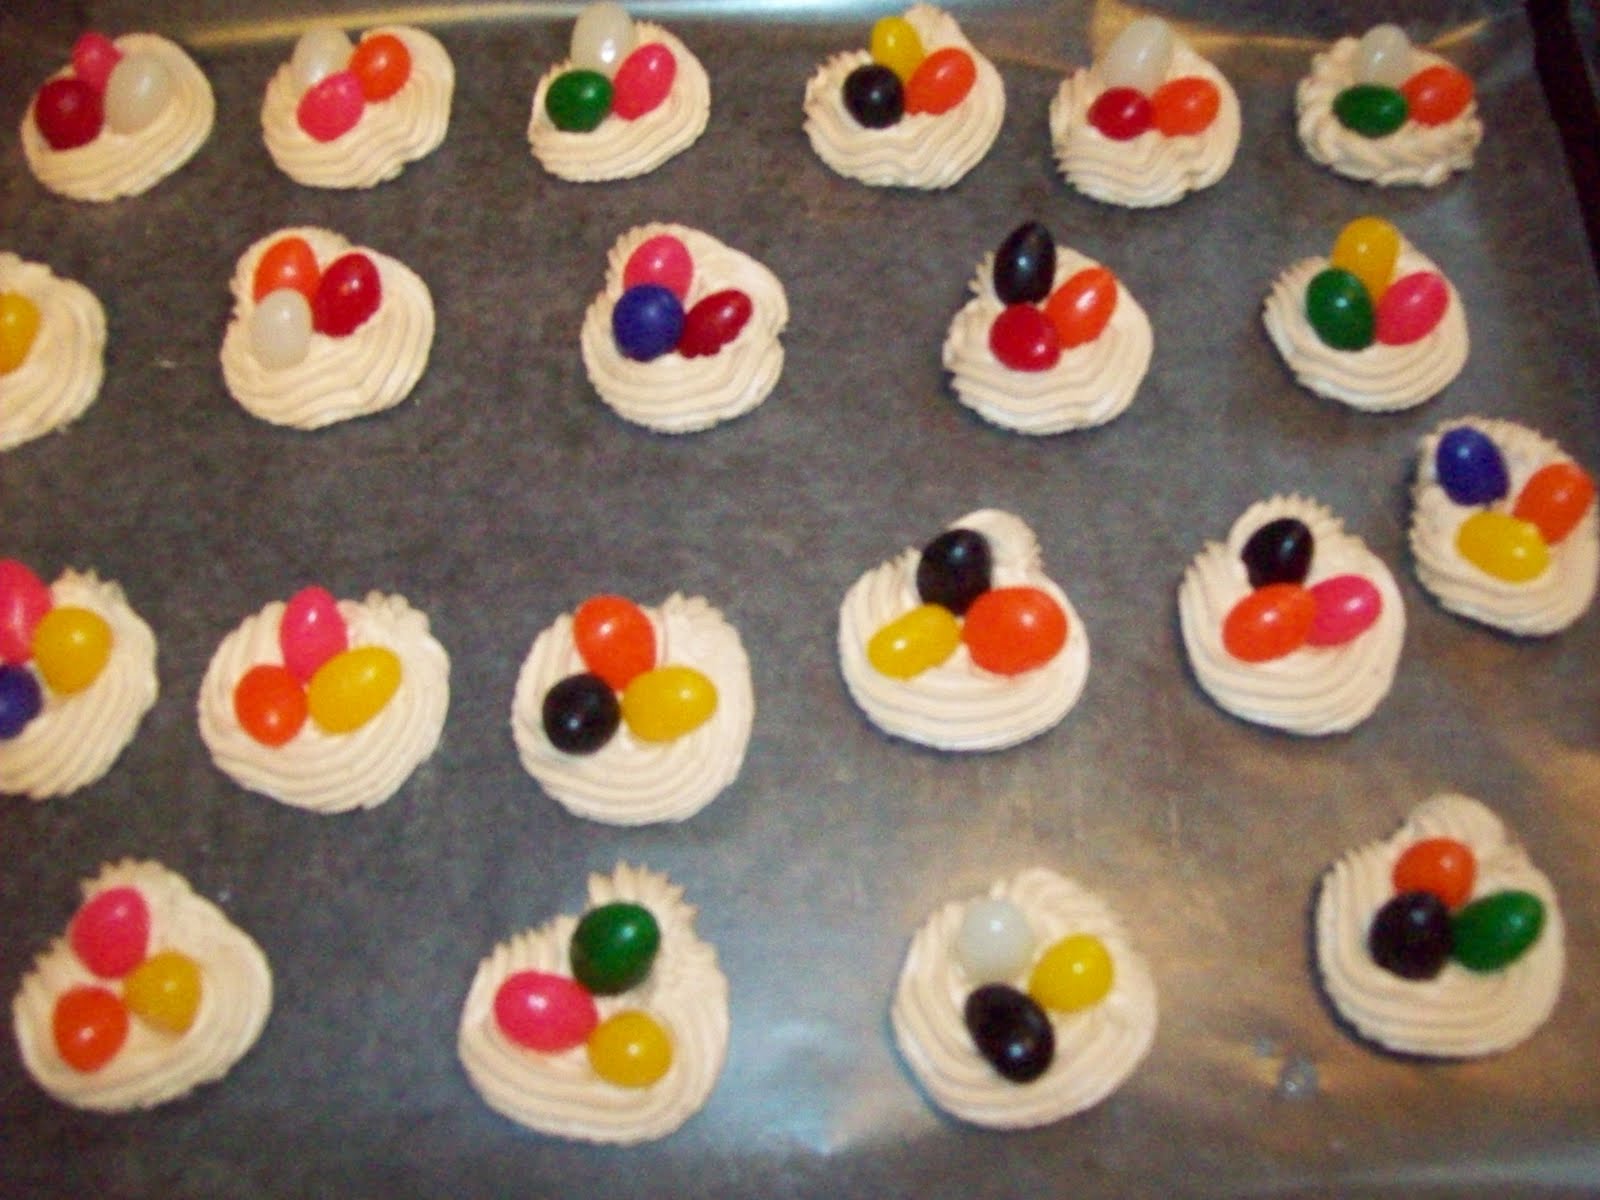
I made them as a small treat to stick in the kids lunches, but I can see them on the tops of cupcakes as well. I wish that the "nest" color were a darker brown (it is darker in real life but not as brown as I would like) and anyone with ideas on how to get a richer brown with food coloring please share! Also, I KNOW these are terrible pictures. It has been overcast and rainy for several days now and I just got tired of waiting for a pretty day. When they were pretty we were sick so I just went for it. Besides, the pics just give you an idea of what to expect, I am sure yours will be lots prettier! If you want to make your own here is how to do it:
You will need:
2 Tablespoons warm water
1 cup confectioners sugar
decorating tip #18 or a large star tip
decorator coupling
ziplock bag or decorating bag
jellybeans
food coloring in yellow, green and red
In a stand mixer add meringue powder, warm water and sugar. Add food coloring to get brown. My box said 6 drops yellow, 5 red, and 3 green. Beat until stiff peaks form (took about 4-5 minutes for me) Don't worry, when I first made this I thought, "there is SO not enough water for this to work!". Trust me, there is! It will look like this:
Using the coupler attach your star tip to your bag. If you are using a baggy be sure to use a large one and one of good quality. I discovered that walmart sandwich baggies just can't stand up to the pressure and develop small pinholes leaving you with a bunch of spaghetti icing strings coming out of your bag everywhere but very little icing coming out of the tip! It was a messy learning experience but one I am happy to pass on to you. Back to the directions. Spoon your icing into your bag and squeeze it to the bottom. Twist the top to keep the icing from coming out the back.
Next squeeze out about 25 circle shapes onto some waxed paper. I tried to just hold the tip in one spot and let the icing balloon out around the tip but I think it looks better if you just squeeze out a circle instead. Don't worry if you leave a small hole in the center, it will disappear in the next step.
Finally, just add some jelly beans to the center of each nest. Be sure to push them down into the icing so they are nice and secure.
Set aside and let them dry. When they dry they are very hard and as such they pack well in lunches.
In the meantime enjoy!
Until next time,