Showing posts with label 40 in 40. Show all posts

Wednesday, March 29, 2017

Scalaria pattern

Every year I try to create a new pattern during my 40 in 40 challenge.  They are often inspired by things I discover online and this one is no exception.  While perusing Pinterest I discovered this pin:
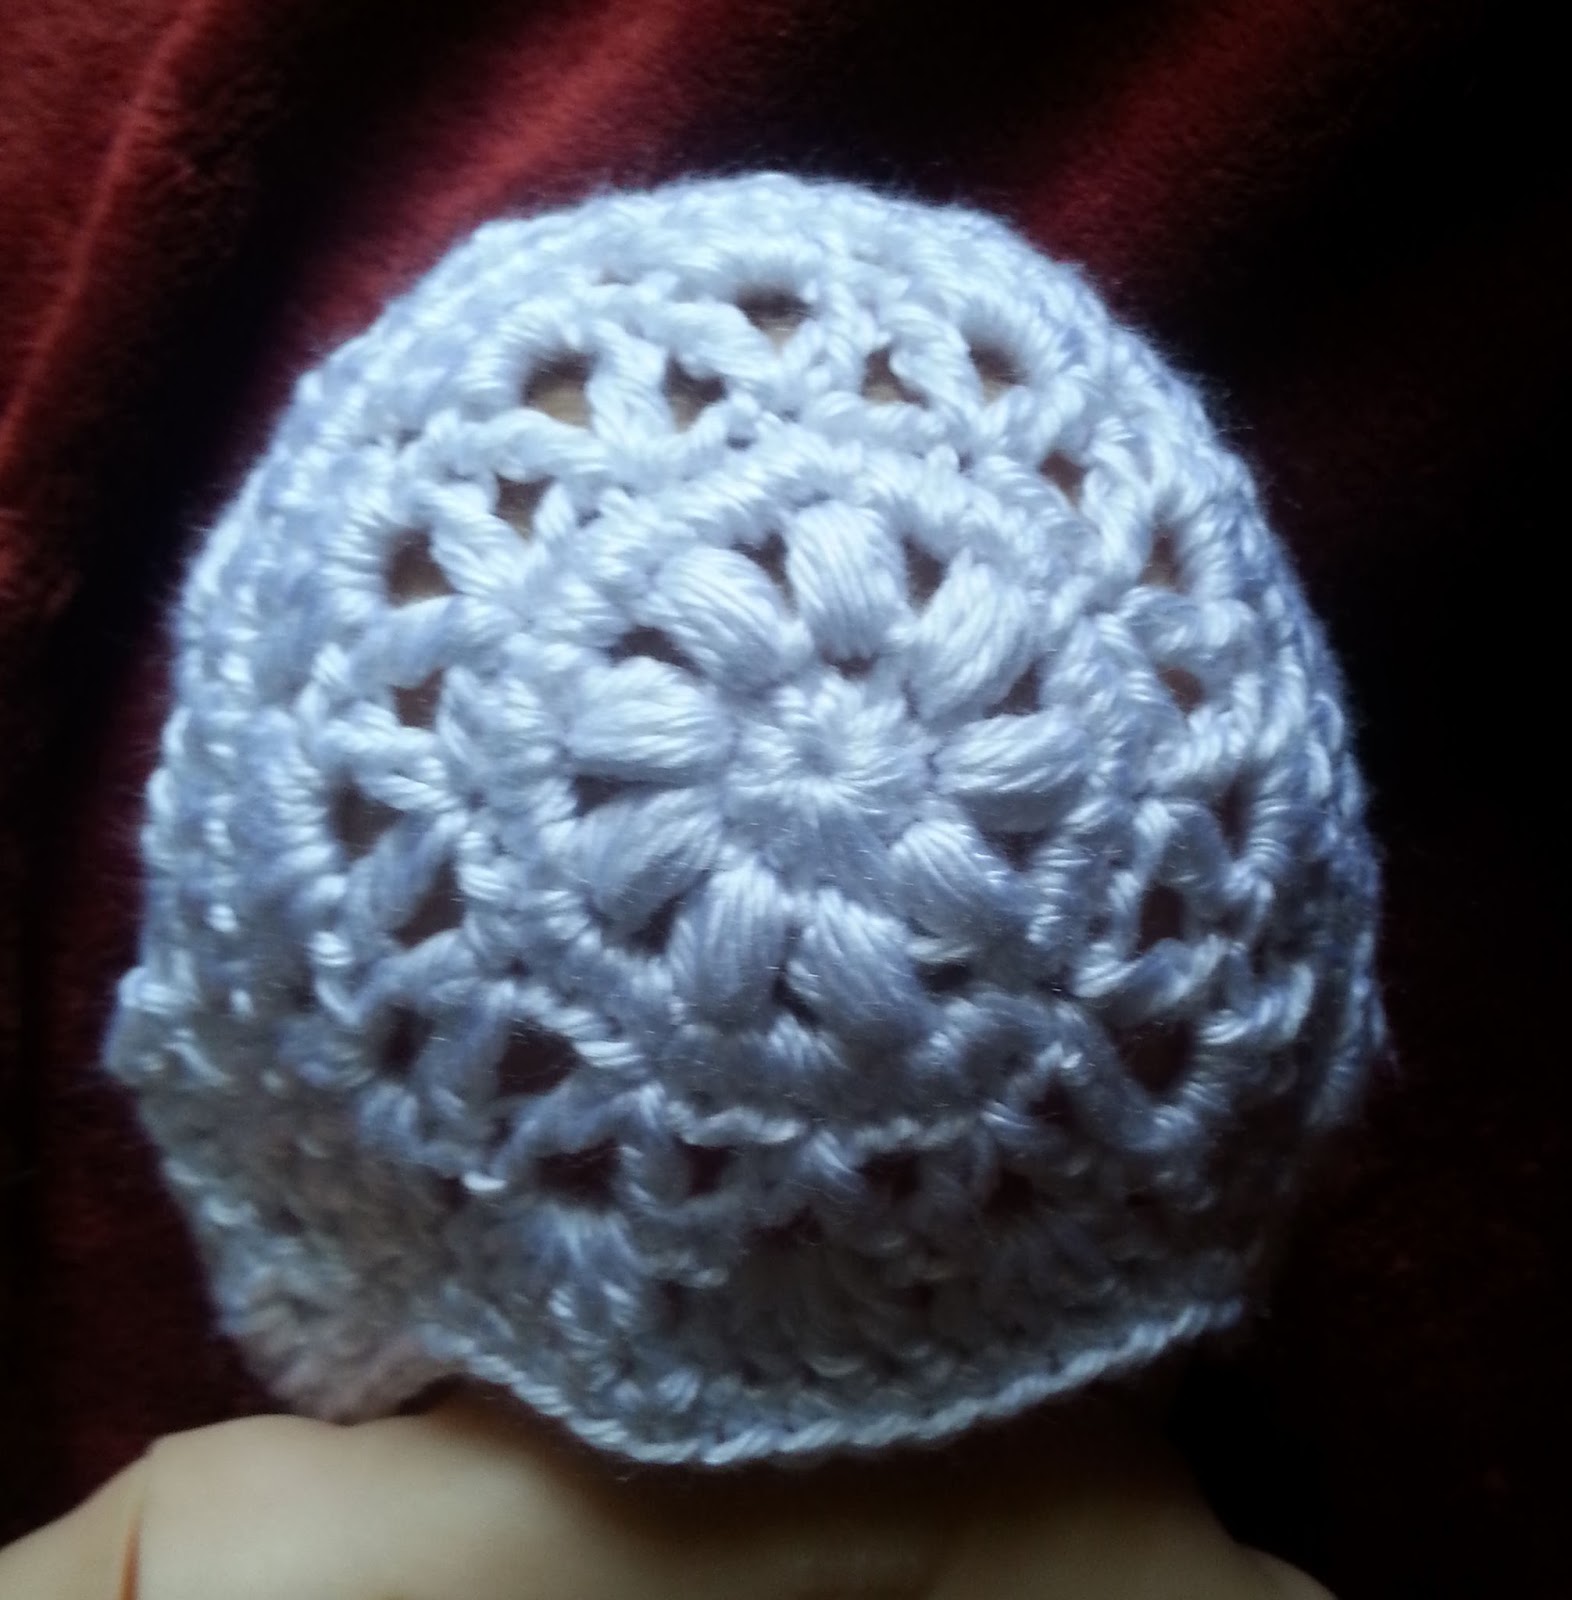
which is an amazing shawl pattern available for free from JessieAtHome.com.  I loved the braid effect and thought it would translate well to a hat.   So I decided to give it a go and came up with the Scalaria pattern.  Scalaria means "ladder" in Latin, and when you drop those stitches it looks like a bunch of ladder rungs.

I admit the idea of finishing the hat and then going back and pulling out so many stitches was scary.  Honestly, dropped stitches were the one and only thing that kept me from loving knitting for ages.  I was terrified of them, and now I am asking you (me) to intentionally drop them!  Are you ready?  Here we go!

Scalaria
Patterned created by Ginny Blankenship of Sunflowers at Home

Sz 6 dpn
Ww yarn (I used Crafters Secret from Hobby Lobby)
Optional :  J crochet hook

CO 60 stitches  using long tail cast on evenly over 4 needles, join making sure not to twist  (You must use the long tail cast on for this to work!  Video tutorials can be found on YouTube if you aren’t sure how to do this)

R1-4:  k2, p2
R5 : knit all stitches
Repeat r5 until hat measures 3.5  inches from co edge

Begin decreases
R1: k 8, k2tog   repeat  (54)
R2 and all even rows: knit
R3: k 7, k2tog  repeat  (48)
R5: k6, k2tog repeat   (42)
R7: k5, k2tog repeat  (36)
R9: k4, k2tog repeat  (30)
R11; k3, k2tog repeat  (24)
R12  k2, k2tog repeat  (18)
R 13:  yo, drop next 2 stitches, k1  repeat  (12)
R 14: ktbl,k1 repeat  (12)

R 15:  *pull dropped stitches loose all the way to the bottom.  Take bottom 3 rungs (think of the dropped and pulled stitches as a ladder, so the bottom 3 steps or “rungs’)  and twist to form a loop,  place loop on crochet hook.  Pull next 3 strands through the loop with the crochet hook. Continue to the top.  Depending on how many rows you worked, you may not have 3 strands at the top.  If you end with 1 strand, add it to the previous loop.  If you end with 2 make a loop with those.  Place final loop on right needle,  Knit next stitch,  pass loop over the knit stitch.  K 1.  Repeat from * around
R 16: ssk around.  Break yarn and pull through the 6 remaining stitches to close top.  Weave in ends.

See, that wasn't so bad!  This pattern will remain FREE until the end of my 40 in 40 challenge.  After that I will be creating a video to assist with R15 and the pattern will be available for purchase on Ravelry and this will be removed, so if you want it, grab it before Easter.

If you are interested in more hat patterns, I am currently offering your choice of either my Ellie or my Roots pattern on Ravelry for free using the code 40in40 until Easter 2017.

Creative Commons License
Scalaria by Ginny Blankenship is licensed under a Creative Commons Attribution-NonCommercial-ShareAlike 4.0 International License.

Until next time,

coupon codes

I forgot to let you know, I am offering 2 of my hat patterns on Ravelry for FREE during the Lent season.  It is my hope that if you choose to take advantage of this, you will make an extra hat to donate to a local charity organization.  You can view the patterns on my Ravelry store here.  The code is good for my Ellie and Roots hats that I designed last year for the challenge.  To get the pattern for free visit the pattern page, choose "buy it now" and enter 40in40 in the code box. 
Roots hat front

Roots hat top


The Ellie hat


 Until next time,


Monday, March 20, 2017

Week 3 of the 40 in 40 challenge 2017

My family is going stir crazy this week.  Our family vehicle broke down on us March 4th making us a 1 car family again.  That means spur of the moment trips to the park because the weather is nice couldn't happen this week.  It means running out of milk went from being a 20 minute trip to the grocery store to an hour long walk on a curvy road without sidewalks.  Although I must admit that not being able to go anywhere was nice to begin with, forcing us to slow down and take a break from everything.  At this point though, we were all relieved to pick up our new to us SUV over the weekend.  Especially since it meant a brief visit with family from Georgia.

One of the good things about not being able to go out as much, I had some extra time after homeschooling to work on the challenge.  That prompted me to work on a couple of lace hat patterns this week.
First up is this simple knit hat called the
Beanie to Match Carole Barenys’ Seamless Yoked Baby Sweater.  I love this with the variegated yarn that has a slow transition.  The slip stitches add interest to what is otherwise a very basic pattern.  As you can see it works up a bit long for a newborn, but you can easily fold up the brim and the extra length means it can be worn for several months.  And the detail on it easily lends itself to being made for boys and girls.  And if you are interested in making the Seamless Yoked Baby Sweater, you can find it here.

The next one is a super quick crochet project that for some reason reminds me of the 20's.  It's called the Charmed Cloche.  You can download the add free PDF on Ravelry here or you can visit the designer's website and grab the pattern for free here.  The pattern is available in newborn to adult sizes and includes an optional flower embellishment.


Next up is a two for one pattern, it is actually called Two Lace Baby Hats.  Each hat has a coordinating blanket that the designer linked to on the pattern page.Both call for a DK weight yarn and size 6 needles.  They are also available in sizes up to toddler.

I worked the first one, the Tiffany Lace pattern, using Simply Soft yarn which obviously isn't a DK weight but still allowed the lace pattern to come through but gave it some thickness.

The second, Fan Lace, I worked using Bernat Baby Sport which gave the hat a much more open lace design.  Directions for both were easy to follow and written very well.  They do involve some more advanced techniques such as knitting through the back looks, and 4 different decrease stitches but don't let that intimidate you.  Take your time and pay attention to the directions and you will do great!

This one was chosen because it was the day I knew I was going to be in a car all day long traveling to pick up our new to us SUV.  I wanted something quick and simple since I needed to be available for a 2 year old that had never been on a trip this long before and because I would be driving for at least half of the trip.  This is the Scallop Hat pattern and you can find it on beginner-crochet-patterns.com That alone told me that this would be a relatively quick pattern with little difficulty....and it was.  Yet that lovely scalloped edge gives it some flair making this a great project for last minute gifts!

I have to say that so far, this is my favorite hat using this yarn.  The yarn is Bernat Baby Sport in Citrus Sorbet .  The hat pattern is the Georgia Baby Hat and it is available in both a large preemie and a newborn size.  In addition you can also grab the matching sweater pattern for free as well.  I chose to work this pattern in the round rather than flat because I hate seaming.  

So that is it for me this week.  Next week we'll reach the half way point. 
Until next time,

Monday, March 13, 2017

Week 2 of the 40 in 40 challenge 2017

 This week I tried a few patterns that I have never done before.  Tried to mix it up with some crochet, knit, beanies and bonnets.  So here is what I accomplished:

 First up is the Preemie Crochet Hat from Britney Wolfe.  I stumbled across her pattern on Pinterest and was tickled to find she is a home school graduate.  This hat is a simple design that would be great for newer crocheters.  I did make a few changes to the pattern because the one I worked up seemed a bit larger than I wanted for a newborn. 

First I eliminated round 4 of the pattern.  I think Wolfe was creating an oversize hat based upon the decreases around the brim.  I couldn't get mine to look right and it
just seemed huge, so I cut out the last round of increases.  Then I added two extra rounds of the ch 2, 1 dc in each stitch to end (round 5-6 in pattern which became rounds 4-7 for me).  I then worked round 7 of pattern next but rather than dc2tog I did a back post dc for that stitch.  Round 8 of pattern became my round 9.  This allowed me to keep the spirit of the pattern while obtaining a size that I was after.
 Next up is this Precious Hearts Preemie Bonnet. I used Bernat Softee for this one because it is supposed to be a DK weight yarn, which is what the pattern calls for (the weight, not this specific yarn).  The doll I used to model this hat is the size of about a 32 week preemie and as you can see it is a little short from crown to front.  I would have to say that this is due to my yarn choice, and my distaste for gauge swatches and not the fault of the pattern.  After completing the hat I checked the wraps per inch and it wasn't 11 (which is DK weight) even though many sites list is
as such.  The good news is that babies come in all shapes and sizes.  The bad news is that because this yarn is thinner than the pattern calls for the hearts don't stand out as much as they should.  Instead they simply look like a blob without definition.....  I plan to try this one again with a different yarn. 


I have to say that this one is my favorite this week, although I do wish I had used a solid color of yarn so that the lace pattern on the sides would have come through a bit better.  As you can see, this is a bit big for newborn, the the designer lists it as 0-6 months so that is to be expected.  It isn't so big that it dwarfs the newborn head though.  This is called the Mori Hikari Baby Bonnet and you can find it over at the Little Precious Stitch.  Despite having been on Ravelry for over a year there were only 2 projects for this pattern, which really surprised me.  It was an interesting pattern and available in sizes all the way up to 24 months.  The back of the bonnet was a bit different than I was used to but not hard to figure out.  It was my first time attaching i-cord as an edging and I love the look of it.


This one is the Sedge Stitch Newborn Beanie by Kerri Stinson.  The original pattern calls for a DK weight yarn but the PDF download also includes suggestions for WW yarn.  I used those, which meant a G hook for me.  I modified this pattern as well.   I skipped rd 6 as including it yielded a circumference that was too large. I repeated rd 8 until the hat measured 4.5 inches long before beginning the brim.  I bet this would look cute with a crochet flower on it too. A few of the examples of Ravelry included a pom pom on the top which looked adorable as well.

 This one was gorgeous also, and would have been my favorite except for one thing, while it is available free you have to give personal information to obtain the pattern.  Designer Julie Grimmet has made this, the Vintage Baby Bonnet, available on her blog.  Place it in your shopping cart and you don't need a code or anything special.  However, to check out you will need to include your name, address and phone number to download the pattern.  I realize you can easily type in fake info, but it aggravates me to have those as required fields for an instant download.

That being said, the pattern is well written and since it uses a "medium weight" yarn it works up quickly in only 11 rounds.  What really drew me to this pattern though is the crown of the bonnet.  Just look at how pretty that is!  Reminds me of a little flower.  I can just picture this as part of a Christening layette.


And the final hat for the week is the Baby Amanda Hat.  As you can see this is a bit large for a newborn, it is advertised as being "infant" sized, more 3 months and larger.  The front has a beautiful, textured design and it is really fun to knit up.  My only complaint about this hat is the back.  You can see where the pattern for each row begins and ends because it creates a weird line that runs up the back.  I think with a little work that can be eliminated by moving a few stitches around each row.

So which is your favorite this week? 
Until next time,

Monday, March 6, 2017

Week 1, 2017

Week 1 is always a short week in my 40 in 40 challenge, as it starts on Wednesday and therefore only 4 projects need to be made.  This year I am attempting to only use stash yarn for my projects. While I have a large stash, this still makes choosing patterns a bit difficult for me.

I tend to bookmark patterns all year that I come across for baby hats.  Then, every week I select my patterns for the week, and lastly I check to see if I have the right yarn.....In the past, if I didn't then I got had to make a trip to purchase some new yarn.  This year I will have to select a different pattern.....sigh.....

But that wasn't a problem this week.  All 4 hats use worsted weight yarn.  So let me show you what I chose.

My first two hats come from the same pattern, the 2 Hearts Newborn Hat designed by Kelly Forster.  You can find the pattern free on Ravelry.  The first is made using knit and purl stitches to cause the heart to "pop out" of the hat.  The pattern calls for an i-cord at the top of the hat that I chose to leave off.  I worked this in Hobby Lobby's Crafter's Secret yarn in Nosegay. 


The second is my first ever attempt at fair isle knitting.  I have to admit that my go around I left LOOOOONNNNNGGGGG threads between the heart patterns (floats) without tacking them which looked really sloppy and messy on the inside.  So I frogged (rip-it,  rip-it, rip-it  go ahead and say it out loud and you will understand why I call it that!)  it and started over.  In hind sight, I might have done better to simply do this in intarsia (which I have never done before either!).  Still I really like the finished project.  This was worked in the Crafter's Secret yarn in Nosegay and in Red Heart Super Savers in Amythest.


I changed the decreases on the second hat from the written instructions.  The hat I worked in Nosegay had a k2tog at the beginning and end of each dpn.  On my second hat I worked a k2tog at the beginning of each dpn and a ssk at the end of each needle.  You can see the difference below:

k2tog at the begiining and end
k2tog at the beginning and ssk at the end


Ella Bonnet

My third hat for the week was the preemie size Ella bonnet designed by Allison Booker, also available on Ravelry as a free download.  Unfortunately, I misread the materials needed and mine came out a bit different than the designer intended.  The pattern calls for 8 mm needles, which I mistakenly read as size 8 needles, which yielded a much different fabric!  Still I like the outcome, even if it is a bit more open.  And in my defense, I had spent the day shopping and setting up for an American Heritage Girls lock in and was actually working on this hat in the dark while the girls were watching a movie!  I used Simply Soft yarn in off white for this project.  I then worked a 2 stitch i-cord for about 10 inches, attached it to one side of the bonnet and used a G hook to sc around to the other side.  I worked a 2nd 2 stitch i-cord, attached it to this side and the sc around the remaining portion of the hat.

My final hat for week 1 I wanted something quick with a simple, repeating pattern to follow since I hadn't slept much the night before.  Myshelle Cole's pattern, Noah, to the rescue!
Also worked with Simply Soft, this pattern uses a technique I had never done before.  The 2nd hdc is worked around the post of the previous hdc - not the hdc of the previous row, but the one one just worked on the same row.  It gives a unique open weave design.  The entire hat is worked in sc and hdc.  And if you decide to give the pattern a try, be sure to look around her website as she has many other preemie patterns available as well.

So that is what was on my hook and needles this week.  What was on yours?

Until next time,

Thursday, February 23, 2017

40 in 40 2017

2017
 There is less than a week until this year's 40 hats in 40 days challenge!  I can't believe that this is my 5th year doing this challenge.  My first post was WAAAYYYYY back in 2012.  For those of you who are new to this, I'll give you the run down.

During the season of Lent I make an extra effort to give back to others by creating a hat a day (except Sundays) for babies.  These hats are then donated to God's Tiny Angels, a local charity that collects hand crafted items for preemies and newborns and distributes them to hospitals all over the country. 

I try to use only free patterns available on the internet and I share them every week with you, here on my blog.  And I invite you to participate with me.  If you are already a member of Ravelry you can join the challenge board here.  If you aren't a member yet, I encourage you to join.  It is free and is a great source for patterns (free and for sale) advice, camaraderie, and assistance.  I have never found a group like it any where else.  And if you have been with me through the years you know that a LOT of my hat patterns come from the wonderful designers on Ravelry.

So dust off your hooks and needles and shop for your yarn....

Until next time,

Monday, March 30, 2015

40 in 40 2015 week 6

I have to say I have been really inspired by the completed hats that have been posted on the Facebook event page!  You are some seriously talented fans!  It was so neat to see that this challenge has benefited people all over the world, including Nova Scotia!

I can't believe there is only one week left.  While I look forward to being able to create in a more relaxed atmosphere, and to tackle some bigger projects, I have to say that I really love the intentional aspect of this challenge each year.  Praying over each item and knowing that I have been able to use the gifts God has given me to help someone else makes this period of Lent really meaningful to me - even when it gets hard to get it all done.

That being said, let me share with you my projects from this past week:

First up is the Aimee Baby Hat.  This is the second time I have made this hat.  The first I used Simply Soft yarn.  This time I used Bernat Baby Sport, a thinner yarn.  Both times the hat turned out to big for a newborn, despite the pattern saying it is sized for newborn to 3 months.  I love the heart pattern that goes completely around the babies head, but I definitely need to spend some time fiddling with my yarn and needles to make it smaller.  14 inches is to big for a newborn.


Next was the Divine hat.  This is available in preemie, newborn and adult sizes - all in the same pattern.  The ridges gently twirl around the babies scalp to come together at the crown.  A quick hat to crochet with beautiful results!


This is the Dania Beanie, available in newborn to toddler sizes.  I admit I am a sucker for the hats with bows!  I would recommend making the starting chain for the bow smaller, as you can see it dwarfs the hat.  Another super simple and quick crochet project.


  My 4th hat for the week is the Sideways Shell Baby hat.  Another quick crochet project.  The designer based the pattern on a Project Linus blanket pattern.  Wouldn't it be cute to make a matched set?


 And then I got on a knit leaves kick!  First up is the Baby Leaves II, which worked up a bit short for me.  So I continued the leaf pattern until after the first decrease on the leaf before beginning the ribbing.  I think I should have used a thicker yarn so that the leaves stood out a bit more.  Since I wasn't completely happy with this one, I tried a different pattern.


This one is the Embossed leaves pattern.  Instructions are given for baby to extra-large adult sizes.  I have to say I was much more satisfied with the way this one turned out.


So that is it for this week.  Only 6 hats to go before this year's challenge is over

Until next time,

Monday, March 23, 2015

40 in 40 2015 week 5

I spent the week really under the weather with a FUO, or Fever of Unkown Origin.  Yes, I went to the doc and as of Friday the lab results point towards some sort of viral infection.  Fortunately by Saturday, after 12 days of fever, I woke up feeling like myself again.  I played catch up towards the end of the week as I didn't really feel up to working on hats at the beginning.  I did manage to get all 6 hats completed though!

Do the Twist was first on my list.  This is the first time I have ever done a top down knit hat.  The designer incorporated a yarn over before every ssk to create the twist, but after I completed about 1/2 the hat I found I didn't like the large hole that left so I frogged it and on the second go around I used a M1 increase instead.  same effect with a smaller hole.  When working the bind off I would recommend using a larger needle and working it VERY losely, otherwise it will be very tight on the baby's head.  (Don't ask how I know!)


This is the Baby Swirls Hat, which is VERY similar to a tawashi.  It finishes up thick and warm, but it is a yarn eater and very monotonous to work.  If you can single crochet, though, you can totally make this hat!


Next was the So Soft Baby Hat.  You will need to join the Lion Brand website to have access to this free pattern, but it is worth the trouble to sign up and membership is free.  I worked 2 i-cords at the top and tied them in a bow rather than the single cord.  Pattern is available in small preemie to large preemie/newborn


This is the Baby Bear hat, a really quick knit using WW yarn.  And I am such a sucker for bear hats!


This is the Serendipity hat.  The pattern is actually for an adult size hat, but with a few modifications I was able to scale it down to newborn size.  To make it I CO 78 using a size 6 set of dpn and Beehive Baby Sports yarn, follow pattern as written until it measures 5 inches from beginning.  Then begin decreases at round 9.  You can use one color as the original designer did, or two as I did here.


And the final hat for the week is titled Seventh.  It is a pretty simple hat to work up using knit and purl stitches to create the pattern.  I used a mystery yarn that I picked up in a bag of mill ends.  I like the striping effect it has, but this pattern also looks beautiful with a solid color.


And that is is for this week.  See you next week!


Until next time,