Showing posts with label recipe. Show all posts

Wednesday, July 10, 2013

Sweet Peanut Butter Popcorn recipe

I am a popcorn fanatic!  I don't just mean that I like popcorn, I mean we keep extra bags of popcorn hidden away just to be sure we don't have a popcorn emergency!  Every night I make up a batch of popcorn and settle on the couch with Mr. Sunflowers for some cuddle/tv time.  Most of the time I am quite content to chomp on buttered corn with a little white cheddar popcorn salt.  But sometimes Mr. Sunflowers wants to eat some too and he prefers his popcorn on the sweet side.  And that is how this recipe was born.

We decided to try melting some vanilla almond bark


and adding that to the popcorn for a sweet coating.  That was pretty yummy, but we decided to take it over the top one day and THAT became our go to sweet popcorn recipe.  Today, I am sharing it with you.


You will need:
2 squares vanilla almond bark
3 Tbsp peanut butter (we use all natural but any kind should work)
8-10 cups popcorn (we use air popped)

Directions:
melt the almond bark in the microwave.  About 1 minute on high should do it.  Stir to make sure all pieces are completely melted.  Stir in peanut butter.  Pour over popcorn and stir until evenly distributed.  Allow to cool (if you can wait that long, we never can!).  Enjoy!

Until next time,

Wednesday, July 3, 2013

Creamy Chicken and Wild Rice soup

After attending a Tastefully Simple party I set out on a mission to recreate their Creamy Chicken and Wild Rice soup.  I think this recipe is pretty close, and almost as quick to make.  Hope you like it as much as we do.

You will need:
4 boneless, skinless chicken breast cooked and shredded
6 cups water
3 Tbsp Better than Bouillon Chicken base  (or you can use 4 low sodium bouillon cubes)
2 boxes Uncle Ben's Long Grain and Wild Rice  (the 5 minute recipe)
1/2 cup unsalted butter
3/4 cup flour
2 cups milk
salt and pepper to taste

Directions:
In a large pot bring the water and Better than Bouillon Chicken base to a boil. Add chicken and the rice, reserving the seasoning mixes.  Cover and remove from heat.

In a sauce pan melt butter.  Stir in the 1 seasoning packet (you can use both but we found that to be very salty).  Add the flour and stir until well combined and bubbly.  Slowly stir in the milk.  (You are basically creating a roux.)

Very slowly and stirring the entire time add the roux to the chicken and rice.  Cook over low heat about 5 minutes or until warm all the way through.  Add salt and pepper to taste.

Until next time,

Wednesday, June 26, 2013

Garlic Bread Sticks

Poor planning on my part created this recipe. I schedule the family meals a week in advance and go shopping all at once. Wednesday nights are typically meals that can be cooked pretty quickly and easily, especially on school nights, so that we can get to church on time. H and J get home from school around 4:30 and we are out the door shortly after 6:30 pm so if I want to get to talk to them about their day and not have to eat while standing up it's got to be quick.

 Anyway, I had spaghetti on the menu. Nothing fancy. Jar sauce that we spice up and dry noodles and garlic bread or bread sticks. Usually we pick up an italian or french loaf on the discount bakery rack and season it up for semi-homemade garlic bread or some discount bread sticks. None this week, which didn't concern me since I was SURE I had something in the freezer. Only I didn't. So I fell back on a recipe for Pretzel Bites I found on the web and played with it. This is what I came up with, and let me tell you - no more store bought bread sticks for us! 


  You will need:
1 1/2 cups warm water 
 1 Tbsp honey 
1 package yeast 4 cups flour (possibly more) 
4 Tbsp unsalted butter, melted 
1 Tbsp kosher salt 

 4 Tbsp unsalted butter, melted 
1 Tbsp garlic powder 
pinch of salt

  Directions: In a large bowl or stand mixer put the first 3 ingredients. (be sure your water isn't too hot, between 110° and 115° is best)  Let this sit for 5 minutes.  You are wanting the yeast to bloom.  Then add the next 3 ingredients.  This should give you a pretty thick dough so you may need to add extra flour.  Knead for 5 minutes either by hand or use the dough hook on your stand mixer.

Lightly grease a large bowl and place your dough into it.  Turn so that the greased side of the dough is up.  Cover with a kitchen towel and place in a warm place to rise for about an hour.  Dough should double in size.  


Divide dough in half and on a lightly floured surface pat and stretch each half into a rectangle that approximately measures 7 inches by 12 inches.  Using a knife or pizza cutter cut into strips.  I usually cut the dough in half along the 12 inch side (2 six inch pieces), then each 1/2 in half and then cut those halves in half.   Place strips onto a baking sheet.  You can get a little creative here.  We sometimes twist the dough first or roll it a little.  If you like light and fluffy bread sticks allow them to rise a second time for about an hour or until doubled.  If you are impatient like me you can skip this for some chewier breadsticks.

Mix the last 3 ingredients together and brush each breadstick with the mixture.  Bake in a 400° oven for about 15 minutes.  Brush with remaining butter mixture and enjoy.  

Makes 16 bread sticks.

Until next time,

Wednesday, June 19, 2013

Tea Time

Recently Princess and I were playing "neighbor" (which is pretty much what it sounds like, we pretend to be neighbors) and having a tea party when she asked why we don't have real tea parties. Hmmmm...... I couldn't really answer that. So I decided we would start having real tea. But being more of the commoner than the high born tea crowd I had to do some research. What do you serve at a tea party? Did you know that there are two types of tea? There is "low" tea and "high" tea. Usually when we think of tea we are thinking of low tea which includes the sweets like crumpets and jam or lightly sweetened scones. High tea includes meat treats. We were having low tea! Again, being very tea uneducated I had to research what crumpets and scones were. I was a tad disappointed to discover that crumpets are very similar to english muffins. I like my english muffins but I wanted something special for tea time, so I checked out some scones. Scones are basically sweetened biscuits. That sounded more like what I wanted for our cup of tea! My first batch was just a simple raisin scone. It was okay and we were all pleased by it but not really wowed which surprised me given that it was from our Good Eats chef Alton Brown.

You can find this recipe here.

So when we finished those up I went searching for another and I think we have found it.  It has apples, cinnamon, nutmeg and they are yummy yummy yummy!  Here is that batch:


My 15 year old son have even decided to join us for low tea just so he can eat some of these!  The good news with that is that we are having Bible study during low tea too!  He is one of those guys who has all the head knowledge but hasn't surrendered yet so this will allow us to talk a little more about God and who He is.  Woohoo!  And if you are interested in this recipe you can find it over on Simply Scratch by clicking here.

But I have to run now.....it's tea time!

Until next time,

Wednesday, June 12, 2013

Baking Day

I am on a domestic diva kick. Mr. Sunflowers has been watching Alton Brown's Good Eats ever since we found it for free on Amazon Prime. Our list of "to try" recipes has grown tremendously. Last week we watched an episode in which he made oat bread ( Oat Cuisine II ). We have been eating whole wheat/whole grain breads for some time now and love it. So we decided to give this recipe a try. To be honest I was a bit scared of it. I have no luck with yeast breads, especially if it requires two rise sessions. My first successful attempt was the pretzel bites and that was only a single rise. Still, I hit the store and began the process. After mixing and 10 minutes of hand kneading this is what I set aside to rise:
After punching it down, placing it in the pan in the fridge for its 8-15 hour second rise and then baking, this is what we had to eat:
and it was YUMMY! I am currently waiting for my second batch to rise. I think our days of buying bread at the store are done! If you want to give it a try you can find the recipe on Food Network here.  Until next time,

Friday, May 4, 2012

Pretzel Bites

I am a soft pretzel addict!  (Which could be because I am a carb addict but that's a different post altogether!)  I can't resist their warm, salty, chewy call and you can often find a BIG box of frozen soft pretzels in my freezer for those emergencies in which even chocolate can't handle.  At least until now!

I have tried many recipes for soft pretzels over the years.  Some were okay, others were horrible but not seemed to be both relatively easy to make and yet still taste and feel like a real soft pretzel.  At least not until now.

To be honest, I don't remember how I came across Haniela's recipe.  I just remember pinning it on Pinterest with the intent to try it one day.  This week I did and I wish I had made them sooner!  They were perfect!  And they are definitely easy to make if I, the gal who can't EVER seem to get a yeast dough to rise, was able to manage making them!  I made a batch to take to my ladies group and ALL of them were gone afterwards!  I even had some who thought they were store bought! 

(Sorry about the photo quality, this was taken with my cell)

Wanna know how to make your own?  Visit Haniela's site for the full recipe.  My next batch I think I will use slightly less baking soda, but there will be many batches of this made in the future!

Until next time,

Wednesday, May 18, 2011

Wecipe Wednesday - Honey Almond Granola

I have a confession to make.  I have become a granola lover.  No, I am not a health nut and I won't sit here and tell you that it is a healthy breakfast, a tasty topping for yogurt and even ice cream.  Generally, granola is just yummy!

I have even turned my kids onto granola!  That is a HUGE thing, especially when little man HATES anything relatively healthy.  (Basically if it grows it is out of his diet, but if it bleeds it is in.)  Even he requests granola and yogurt for lunches.  And I figured that if I can get my kids to eat this stuff, maybe you might want to get your kids to eat it too.

I prefer to make my own because then I can control what goes in it.  Little man doesn't eat fruit in his so I can make a big batch and then divide it up so some has fruit and others do not.  You can also decide if you want more or less of one of the add ins, or even leave an add in completely out.  You can total control!  (With a 2 year old in my house sometimes it is nice to feel like I have control over something)  So here is my go to granola recipe:


 You will need:
3 cups rolled oats (not instant or 1 minute cooking) 
1 cup flaked coconut, unsweetened 
1/2 cup  honey 
1/4 cup wheat germ  
1/2 cup slivered almonds 
2 Tbsp unsalted butter (may substitute oil of your choice) 
1 tbsp vanilla
How to:
In a small pan mix the butter and honey.  Bring to a boil.  While this is warming mix everything else but the vanilla in a large baking dish.  Once honey mixture boils remove from heat and add vanilla.  Pour over the oat mixture and stir thoroughly.  Place in a preheated 300 degree oven.  Bake for 45 minutes stirring every 15 minutes.  Allow to cool completely before eating.

You can add dried fruit after it comes out of the oven and you can add different nuts if you wish

Until next time,

Wednesday, May 4, 2011

Breakfast Bar recipe

H is going on a field trip to King's Island with the school this week, which means an early day.  She will have to be at the school by 6 am and will be eating breakfast on the bus.  I was given the choice of either letting the school pack her breakfast and paying for a lot of preservatives and junk food (they are seriously packing "super doughnuts" to give the kids for breakfast!) or I could pack and send one with her.  Guess which one I chose!

Now, don't get me wrong, I am not a health nut.  I eat doughnuts and junk food on occasion.  But I seriously think that if I am going to pay for a meal at school, it should be relatively healthy.  Especially when they have put so many restrictions on the food that parents can bring in for parties.  (I can't order pizza for a class party but I can order pizza through the school for a class party.  I can't bring in cupcakes on my child's birthday, but they can serve super doughnuts for breakfast.  No candy for the Easter egg hunt but I am expected to sell candy, cookie dough, and candy coated popcorn for school fundraisers.  Makes LOTS of sense to me!)  Any way, enough ranting.  The point is that I had to come up with something that doesn't require refrigeration, was relatively healthy, tasted good, was portable, requires no utensils to eat, and I can pack in something disposable.  What came to mind?  Breakfast bars!

I love the ease and portability of a good breakfast bar.  I also like that when you make them yourself you can throw just about anything you want to in them.  So I figured why not share my basic recipe with you so you too can enjoy your own breakfast goodness.

Sunflower's Breakfast Bars
 (YES!  I took this picture on my back deck because the sun was finally out and
I could get a decent picture of something....finally!)

2 cups old fashion oats (these are the ones you have to cook, not the 1 minute or the instant variety)
3/4 cup milk
1 cup mashed fruit of your choice (this batch was 1/2 cup applesauce and 1/2 cup mashed ripe banana)
2 large eggs
1/2 cup brown sugar
1 tsp vanilla
1 Tbsp cinnamon
1 1/2 tsp baking powder
1/2 tsp salt
1 cup of any add ins you want or leave this out.  It's your breakfast bar!  Some suggestions are raisins, nuts, chocolate chips, coconut etc

Here is the hard part.  Preheat the oven to 325 degrees F.  Spray an 8 by 8 pan with cooking spray.  Dump all of your ingredients in a bowl and mix thoroughly.  Pour into the pan and cook for about 1 hour.  Allow to cool completely and then cut into bars.  (I prefer to make 3 cuts L to R and then one cut top to bottom down the center to get 8 bars)

I love "dump" recipes.  They are pretty much fool proof.  Let me know what you think if you decide to make a batch!
Until next time,

Wednesday, April 13, 2011

birds nest candies

I am currently working on a few pattern designs, Princess A was sick last week, Little Man J was sick over the weekend which meant that Momma Sunflower was sick yesterday.  How is it that my little sunflowers don't want to share doing dishes, doing laundry, vacuuming, yard work etc but they are SO willing to share illness?!  Just doesn't seem fair!

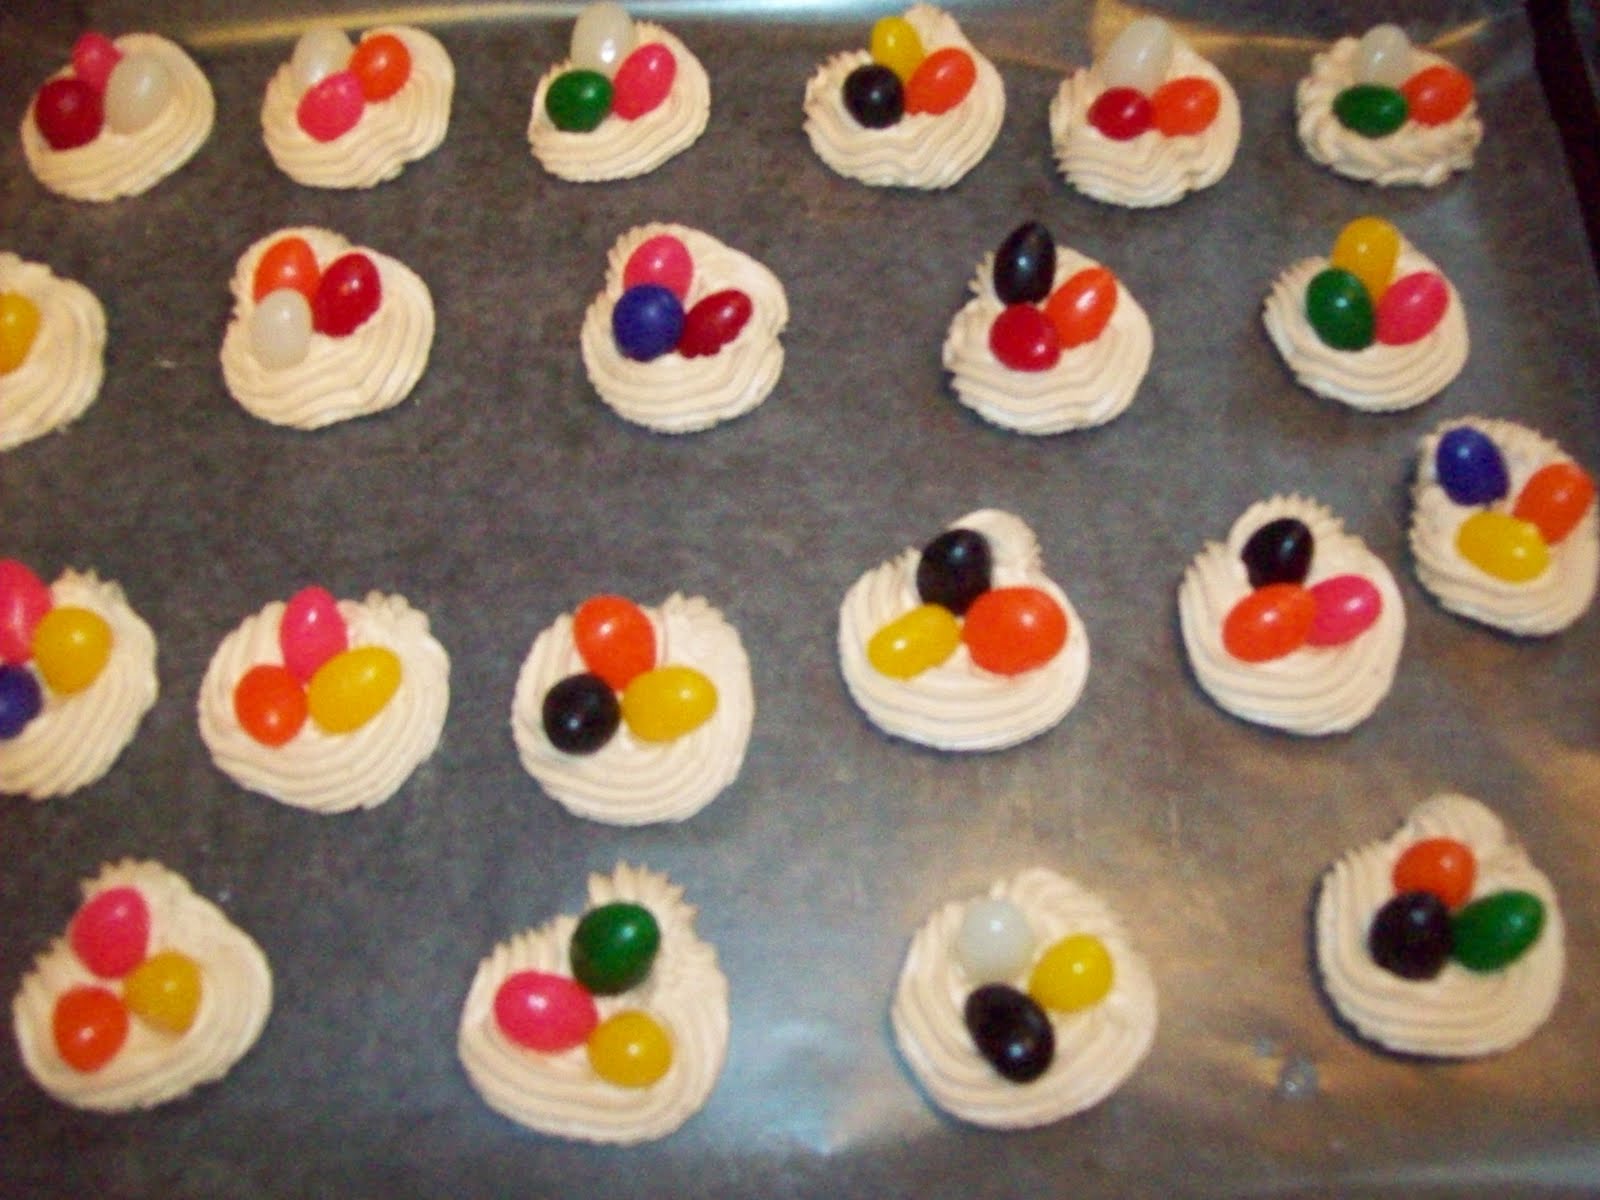
Anyway, today all felt better so I got to make these little goodies:
I made them as a small treat to stick in the kids lunches, but I can see them on the tops of cupcakes as well.  I wish that the "nest" color were a darker brown (it is darker in real life but not as brown as I would like) and anyone with ideas on how to get a richer brown with food coloring please share! Also, I KNOW these are terrible pictures.  It has been overcast and rainy for several days now and I just got tired of waiting for a pretty day.  When they were pretty we were sick so I just went for it.  Besides, the pics just give you an idea of what to expect, I am sure yours will be lots prettier!  If you want to make your own here is how to do it:

You will need:
1 Tablespoon .Meringue Powder  (Yes, I am a chicken and I don't use egg whites!)
2 Tablespoons warm water
1 cup confectioners sugar
decorating tip #18 or a large star tip
decorator coupling
ziplock bag or decorating bag
jellybeans
food coloring in yellow, green and red

In a stand mixer add meringue powder, warm water and sugar.  Add food coloring to get brown.  My box said 6 drops yellow, 5 red, and 3 green.  Beat until stiff peaks form (took about 4-5 minutes for me)  Don't worry, when I first made this I thought, "there is SO not enough water for this to work!".  Trust me, there is!  It will look like this:
Using the coupler attach your star tip to your bag.  If you are using a baggy be sure to use a large one and one of good quality.  I discovered that walmart sandwich baggies just can't stand up to the pressure and develop small pinholes leaving you with a bunch of spaghetti icing strings coming out of your bag everywhere but very little icing coming out of the tip!  It was a messy learning experience but one I am happy to pass on to you.  Back to the directions.  Spoon your icing into your bag and squeeze it to the bottom.  Twist the top to keep the icing from coming out the back.

Next squeeze out about 25 circle shapes onto some waxed paper.  I tried to just hold the tip in one spot and let the icing balloon out around the tip but I think it looks better if you just squeeze out a circle instead.  Don't worry if you leave a small hole in the center, it will disappear in the next step.
Finally, just add some jelly beans to the center of each nest.  Be sure to push them down into the icing so they are nice and secure.  
Set aside and let them dry.  When they dry they are very hard and as such they pack well in lunches.  

In the meantime enjoy!


Until next time,

Wednesday, March 9, 2011

people crackers

I know, what a yuck title, but I couldn't figure out what else to call them.  Little crackers that are shaped like people but taste like those fish that are orange and made by some farm and comes in little packages like this:
While others find that they don't taste fishy at all but are more like the square orange crackers that come in a package like this:

And since there is no consensus.......people crackers it is......except all of the ones I made aren't people shaped.  After punching and pushing dough out of what felt like 100 people shaped cookie cutters I was tired of it.  I spent 30 minutes rolling dough and punching shapes.  Seriously not worth the effort in my book.  A few to use as decorations is great but millions of little people crackers?  Huh uhh!  They would start a riot and take over my house or something.  I was having premonitions of doom!  So I began cutting squares, then rectangles, then rhombuses with wavy sides.  (What is a rhombus you ask?  It is a quadrilateral with four equal sides.....or simply put a squashed square!  I know you are asking because my brain drew a geometry blank as I tried to figure out what the name was and I had to google it for you!)  So they aren't all people crackers, just some, maybe 1/4 of them.

Still, they are yummy and I wanted to share with you!

You will need:

1 cup wheat flour ( you can use all purpose if you want to for a lighter colored cracker)
3/4 tsp salt
4 Tbsp unsalted butter that is cold and cut into small cubes
pepper to taste
4 Tbsp water
2 cups shredded cheese of your choice

Directions:
Mix the flour salt and pepper.  Using a pastry cutter or two knives cut butter into the flour mixture until it resembles fine crumbs.  Cut cheese into mixture a little at a time.  Once mixed, begin adding water one tablespoon at a time and stir until the mixture forms a ball.  Place in a plastic bag and refrigerate for a few hours or up to a day.
Roll dough out onto a floured pastry cloth or board.  (Don't have a pastry cloth?  See my note at the end.)  You want the dough to be thin, about 1/8 to 1/4 inch.  cut out your shapes


and then place them on an ungreased cookie sheet.  Bake at 350 degrees for 10-12 minutes or until golden and crispy. Allow to cool completely before storing in an air tight container.

If you are still here and haven't run off to search for your pastry cutter then you must be looking for my note on a pastry cloth.


Basically,  all a pastry cloth is is a cloth that you use for rolling out pastries.  The flour primarily remains in the cloth so that your dough doesn't get tough but it still keeps the dough from sticking to the surface you are rolling it on.  It also makes it easier to roll our the dough in my opinion since it doesn't stick to the surface.  It also makes clean up LOTS easier.  Simply roll your dough onto the floured cloth.  Once you are done with it gather the corners, shake it off over the garbage can or outside then toss in the washing machine.  No counters with stuck on dough to scrub.

Now for my hint.  While you can go out and buy special cloths for this purpose, you probably already have one in your house.  Go open your linen closet.  Look around.  Do you see the pillow case that no one ever uses because it doesn't match anything or because you just don't like it.  Look again.  It is longing to be your new pastry cloth.  Or if you don't have one of those pillowcases, how about an old sheet that you haven't used in years and looks like it would be at home in a 1970's replica home.  It is begging to have a purpose in your house again.  With a few snips of the scissors you have one for you and several to give as gifts.  You can even get all fancy if you want to and sew a hem in the sides to keep them from unraveling although it really isn't necessary.

So what are you waiting for?  Go to your linen closet, get your pastry cloth and get cooking girlfriend!  These are yummy!

Oh, and if you are still here, there is this awesome thing called a food processor that works great when making this dough.  Just add the flour salt and pepper, pulse, butter, pulse, cheese, pulse, water (a little at a time pulsing after each addition until a ball forms) then follow the rest of the directions.  My food processor is just a baby and couldn't handle all the work so I had to do it the old fashioned way.  

Until next time,

Wednesday, December 1, 2010

Pumpkin Cheesecake - Wecipe Wednesday

I type this while looking out the window at our first snow of the year.  It is a beautiful site.  Wanna see?

When Princess A woke up this morning I took her outside.  Her first words?  "What is that mommy?"  I love seeing things for the first time through her eyes.  We touched.  "It's cold mommy.  Is it rain?"  "No, baby not rain."  Daddy put some on his finger and tried to get her to taste it.  She made daddy taste it first.  Again she declared it as cold.  "Do you think it is pretty?," I asked.  "Yes, mommy, pretty!" We went inside and she watched through the window for quite a while watching the big soft flakes fall.  Although not officially winter, in my book winter has arrived!

Today I want to share a recipe with you that we tried for the first time on Thanksgiving this year.  It was also my first ever "real" cheesecake.  I had done the whipped ones before but never one that required baking.  The recipe comes from a Krogers flyer that we recieved.  I did discover that there is even more of a difference between fresh and preground spices than I thought as we had fresh allspice so I only used half of what was called for and it was still overpowering!  All in all though I really liked the finished product.  That is why the picture is of just a single slice.  Only 3 pieces were left when I realized I didn't have a picture to share!

Pumpkin Pie Cheesecake with Ginger Crust
recipe from page 15 of Kroger  My Magazine TKRK01

Crust:
2 cups ginger cookies, ground
2 Tbsp brown sugar
1 tsp. ground ginger
1/4 cup melted butter

Filling:
16 oz cream cheese
3/4 cup sugar
2 eggs
15 oz pumpkin
1 cup sour cream
1 1/2 tsp cinnamon
1/2 tsp nutmeg
1/2 tsp ginger
1/2 tsp cloves
1/2 tsp allspice
1/2 tsp salt

Directions:
Preheat oven to 350 degrees.  Mix ground ginger cookies with brown sugar and ginger.  Add melted butter and blend thoroughly.  Press firmly into the bottom of a 9 inch springform pan.  Bake for 10 minutes.  Remove from oven and turn oven down to 325 degrees.  Proceed to make filling.
Beat cream cheese until smooth with an electric mixer.  Gradually beat in sugar.  Beat in eggs one at a time.  In a separate bowl mix sour cream and pumpkin.  Stir in all spices and salt.  Gently stir the pumpkin mixture into the cream cheese mixture by hand.  Pour filling into crust.  Place pan on a large square of aluminum foil and wrap pan tightly with foil.  Place pan into a large roasting pan.  Fill the pan with VERY hot water (at least 1 inch up the side of the pan) to create a water bath.  Bake cheesecake for 1 hour.  Turn oven off and leave cake in oven for another hour.  Remove and chill in the fridge before serving.

Hope you enjoy it as much as I did!

Until next time,

Wednesday, November 24, 2010

Day 10 - Ten Days of Turkey

On our final day of Ten Days of Turkey I decided to play homage to the pumpkin
Such a wonderful vegetable!  It can be our Halloween trick or our yummy treat.  I LOVE pumpkins.  For me they are the symbol of Fall.  We like to make our own pumpkin rather than used canned.  It really does taste better!  Especially if you grow it yourself.  We grew mini decorative pumpkins this year and no big guys so I don't have any pics to share :(  To make your own pumpkin puree, cut the pumkin in half, remove the seeds and butter the inside of the pumpkin.  Place on a baking sheet and roast at 350 degrees until the flesh is soft, about 30-45 minutes.  Allow to cool.  Scrape the flesh from the rind and place in a blender.  Give it a whirl.  This makes LOTS of pumpkin puree so either be prepared to do some serious cooking or have some freezer bags ready.  I like to measure out 1 1/2 cup servings and freeze.
So on to today's recipes.  First up,
pumpkin pancakes

2 cups all-purpose flour
3 tablespoons brown sugar
2 teaspoons baking powder
1 teaspoon baking soda
1 teaspoon ground allspice
1 tablespoon ground cinnamon
1/2 teaspoon ground ginger
1/2 teaspoon salt
1 1/2 cups milk
1 1/2 cup pumpkin puree
1 egg
2 tablespoons vegetable oil
2 tablespoons vinegar

Mix all wet ingredients together in a bowl. Sift dry ingredients into the bowl and stir together.  Allow to sit for a few minutes for extra light pancakes.  Heat a griddle to 300 degrees or a frying pan over medium high heat.  Lightly butter pan.  Pour batter by the 1/4 cupful onto pan.  Gently spread batter into a circle.  Brown on both sides. 

Pumpkin Carrot Muffins
These are REALLY yummy and my son who hates both pumpkin and carrots loves these muffins!

1 1/2 cup pumpkin

1 cup brown sugar
1/4 cup oil
3 egg, beaten
1 1/2 cup grated carrots
2 1/4 cup flour
3/4 tsp salt
1 tablespoon cinnamon
1  1/2 tsp baking soda
1 tablespoon baking powder


Beat together pumpkin, brown sugar, oil and egg. Add in carrots. In a separate bowl, blend together flour, salt, soda, baking powder and cinnamon. Add to the pumpkin mixture. Fill muffin tins about 2/3 full. Bake at 375 degrees for 10-14 minutes. Makes 18 muffins.


Until next time,

Wednesday, November 17, 2010

Day 3 - Ten Days of Turkey

This being Wednesday, it's time to share a recipe.  Only this one isn't so much a recipe as it is a concept.  If you are a follower, you remember reading about me purchasing some leaf cookie cutters in this post.  They were actually sought and bought for this project. 

I wanted to have some fall cookies for the kids. I had visions of beautifully decorated sugar cookies nestled into my children's lunch sacks.  Me in an apron with many bowls of tinted decoraters icing delicately decorating these cookies.  Then reality hit.  I don't own an apron, and I am so NOT a patient person.  So instead I came up with these:

I think they turned out very "Fall-y"  although I came to another realization while rolling and cutting out the cookies.  I don't particularly like rolling and cutting cookies!  That lead to the creation of these:

which may not look as appealing, but in my opinion these were the better of the two.  So this weeks Wecipe Wednesday is a 2fer.

You will need your favorite sugar cookie recipe.  Here is mine

Prepare your recipe.  For the leaves roll out the dough to about 1/4 of an inch and using a large cutter, cut out your leaf shapes.  Bake according to the recipe directions and allow to cool.
With the remaining dough, form round balls using about a tablespoon of dough each by rolling it in the palms of your hands.  Use your thumb to create an indent in the top of each ball.  Here comes the twist.  Open a can of cranberry sauce (regular or whole berry, your choice)  spoon about 1/4 teaspoon of sauce out and place it in the indent of each cookie.  Flatten the sauce out slightly.  Bake using the same time and temperature as for the cutout cookies.  When they come out of the oven you may need to press the jelly down again. 
Back to the leaves.  Put about 2 tablespoons of corn syrup in a small bowl.  (one bowl per color you want to use)  add about 1/2 teaspoon water and a few drops of food coloring.  Mix.  Using a clean, never used for paint paintbrush apply the lightest color first.  You don't need to be neat, just brush it on and cover the cookie.  I will say that you don't want to soak the cookie, but you don't need to be neat with this either.  Once you have painted all the cookies, go back and add another color.  I found it best to add the second color to the outside edges of the leaves and then kind of drag the color towards the middle of the cookie.  But feel free to experiment.  When done painting allow cookies to sit and for the color to soak in.  The syrup will leave the cookies with a glossy shine and depending on how much syrup you applied they may be tacky.  To add veins I used a food safe marker but you can also use straight food coloring and a toothpick.
Our favorite of the two is the cranberry cookies.  They are sweet with a tang to them.  But H claims that her classmates liked the looks of the leaves better.  Would love to see your leaves!


www.flickr.com

items in Sunflowers At Home tagged with leafSee more in the Sunflowers At Home pool tagged with leaf


Until next time,

Wednesday, November 3, 2010

Chocolate dipped peanut butter crispy bars

This week's entry isn't a glamourous recipe, but it is a yummy one!  However, a lot of work has gone into the prep of this yummy treat today.  Not that it was at all necessary, but lately I have been intrigued by the bento concept.  What is bento you ask. (at least I hope you are asking otherwise I feel really stupid going on about it.  Are you asking?  even just a little curious?  please say yes!) 

Bento the art of packing meals in a single, compact container that is visually appealing.  Now, I am not yet into the compact single container aspect of it as my kids have their standard lunchbox that requires me to individually package things.  I just can't convince myself to go out and buy a new container this year.  Maybe next year.  But the whole visually appealing thing appeals to me.  Don't believe me?  Check out what I did for Halloween lunches here and here.  That being said I just couldn't make plain jane squares! 

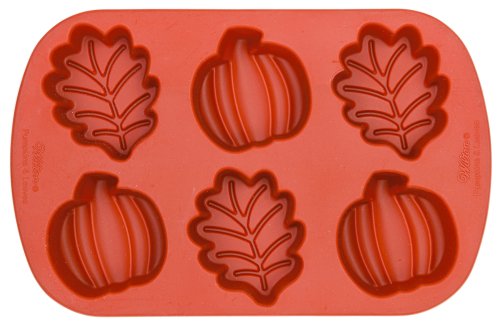
So I packed up Princess A (she's to big to call baby A now!), printed off coupons for AC Moore, Michael's and Hobby Lobby, grabbed the package hubby wanted me to mail and off we went.  I was hunting for some fall shaped cookie cutters in various sizes, a silicone fall muffin pan, and some sort of turkey decorations.  I ended up going to AC Moore and Michael's twice.  AC Moore had nothing I wanted the first go around.  Off to Michaels where I picked up these

with a 40% off coupon.  They also had my silicone muffin pan, but I was sure Hobby Lobby had it on sale for 50% off because they did when I was there just a few days ago.  So off to Hobby Lobby to use my coupon.

Only there was no baking pan.  So I decided to look for some of the infamous food writer pens that I hear about on a lot of the bento websites.  They had been at Hobby Lobby last time I was there.  No such luck!  So I ended up walking out of Hobby Lobby with a $2 package of 15 mini christmas cookie cutters.  Not relevant to this project but I am sure they will come in handy in the future!

So back to Michael's which fortunately honors competitor coupons so I used my Hobby Lobby coupon to purchase my silicone muffin pan.  Which I am also not using today but look for a recipe using it next week!

 That left me with an AC Moore coupon and a desire to own some of those food pens.  Back to AC Moore only to discover that while they have them, even with the coupon the purchase would be more than the cost of the pens at Wal-mart!  So what is a crafty gal to do when she has a coupon and nothing to purchase with it?  Simple, strategically and secretly place the coupon on top of a fellow crafty gals future craft projects in her shopping buggy!  I don't know about you but I would love to be shopping and discover a coupon for 40% off in my buggy.  That means I get to buy more stuff!  Off to Wally World.

By now it is about an hour past Princess A's scheduled naptime.  She is doing well because I had received a new DVD to review in the mail just as I left the house and she was enjoying one of the rare times I allow her to watch movies in the car.  (Look for the review tomorrow)  We arrive at Wal-mart where I purchase marshmallows (that was for today's recipe), and milk.  Back by the milk I notice the reduced bakery rack and grab a loaf of garlic italian bread to go with dinner tonight.  Then I see a display with things for $.25 so I check it out and pick up some halloween colored and fall colored sprinkles as well as some really cute owl and pumpkin cupcake liners.  So I grab those  and go after my food markers and as I am making my way over to the party supplies area (I really miss craft departments!) I notice that kids clothes were on sale.  Of course I had to browse and I ended up buying 2 shirts and a skort for H for Christmas and on the other side of the aisle I saw they had sweatpants out.  H is going to be Cupid in the school play and I have to make a costume so I grab a pair of brown sweatpants.  No brown sweatshirts though.  Finally I make it to the party supply section, purchase my pens and finally head home.

Welcome to a day in my life.  Kind of random and lots of side tracks but the job gets done. That brings me to today's recipe.

Chocolate Dipped Peanut Butter Crispy Bars
You will need:
6 cups crisp rice cereal
1 bag large marshmallows or 4 cups mini marshmallows
3 Tbsp butter or stick margarine
1/2 cup peanut butter
melting chocolate of your choice


In a large pot melt butter.  Add marshmallows and stir until melted.  Remove from heat.  Stir in peanut butter until melted.  Add crisp rice.  Press into a greased 9X13 pan.  Allow to cool.  Cut bars.  Melt chocolate and dip the bottoms of each bar.  Set on wax paper and allow to set up.

I love the acorn and oak leaf.  Not to impressed with the maple leaf for this project.  To cut I just flipped the pan onto the counter and then used my cutters.  For the acorn I dipped the cap in chocolate as well as the bottom.  For the oak leaf I used a spoon to drizzle vein lines.  Hope you enjoy!
Love,
 

Tuesday, October 26, 2010

Halloween Treats! (Wecipe Wednesday a day early)

Fall is my absolute favorite season of the year.  I love the colors, the weather and I love the yummy treats with Halloween and Thanksgiving!

This is the first year I have ever packed lunches for my kids for school.  In years past we just took the easy way out and had them eat whatever the school prepared.  This year, however, I went out and bought the lunch boxes, the juice boxes, and have been having a ball planning the meals and including a special treat for them just to let them know I think they are really awesome kids every Friday.  But this is Halloween week!  That means something creepy in the lunch box every day!

Yesterday they had mummy dogs only I am a cheapskate and didn't use refrigerated dough. I bought one of those cheap, just add water pizza crust mixes.  I mixed up a batch, rolled out some long logs and used those to wrap my mummies.  I ended up with extra dough so I took the logs, sliced one end into several strips to make it look like a broomstick and baked it with the mummy dogs.  Today the broomsticks were packed up with some pizza sauce pureed witch.

In addition to the broomsticks and dipping sauce, I wanted to share my witches boogers and pumpkin poop with you.  Do you remember the old-fashion candy dots that came of strips of paper and you just ate the little dots off of the paper?  I found a recipe for them!  It is really simple.  Just take 2 egg whites and beat them until very frothy.  Slowly add 2 1/2 to 3 cups powdered sugar.  That is it!  I tinted some green and some orange, put them in a piping bag and I used a star tip.  I thought it would make pretty little stars like you get when you use icing.  As you can see below you just get round buttons.


I guess this just isn't stiff enough to hold its shape.  So don't bother trying to get fancy with this.  If you don't have an icing bag and tip, just use a plastic bag and cut a very small hole in one corner.  I cut strips of regular copy paper 2 inches by 11 inches.  Be sure to leave a space at the bottom to label the strips if you want to.  I discovered that you will get tired of piping little dots long before you run out of stuff to pipe!  When that happened I simply drew little ghosties on some paper and filled them in.  I mixed up a small amount of black food coloring (just use one drop of red, blue and green liquid coloring) and used a toothpick to dot eyes and mouths.
It takes about 20 minutes for the dots to be dry to the touch.  Let them sit overnight to dry out completely.  Then I just rolled each strip, secured with a rubber band and tossed it in the lunch box.  Hopefully the kids will enjoy them.  
I case you missed them, look at the pic with the witches boogers again.  Yep, those are eyes!  Look for them to appear in a project coming soon!  Happy Halloween!

I plan to add this to Tip Me Tuesday!
handmade projects

Love,